
Hand-Built vs. Wheel-Thrown Mugs: A Practical Comparison for Small Studios
A working potter's comparison of hand-built and wheel-thrown mugs — covering real time costs, equipment needs, consistency, design freedom, and how to match the method to your studio.
The first mug I made by hand took two evenings and came out with a handle that leaned like a fence post in a storm. The first one I threw took four minutes on the wheel, then another twenty of trimming and quiet swearing. Both held coffee. Both taught me something about how I wanted to work.
If you run a small studio — a corner of a garage, a shared space with booked wheel time, a table by a window — the choice between hand-building and throwing mugs is less about which method is better and more about which one fits the hours, equipment, and temperament you actually have. Here is the comparison worth having before you commit.
Time: Where the Hours Actually Go
Throwing looks fast because the visible part is fast. Once you can centre reliably, a cylinder mug takes three to six minutes at the wheel. Trimming is quick if you catch the piece at the right stage, and handles add a few minutes each. Then there is wedging, setting up, and the cleanup tax: twenty minutes of wiping the wheel head, splash pan, tools, and floor.
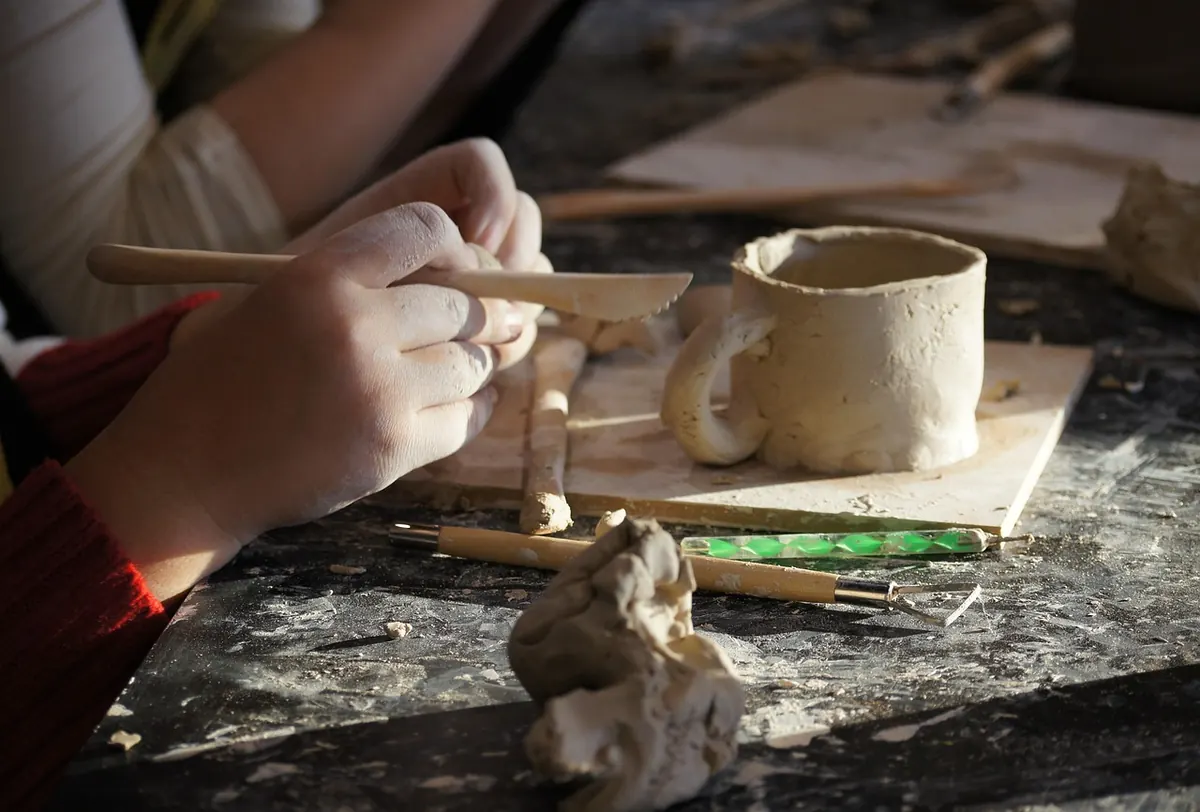
Hand-building hides its time differently. A pinch pot forms in minutes and then asks for slow, patient refining — thinning walls, smoothing, compressing. Slab work is the sleeper speed option. Cut a card template, roll a slab between thickness guides, wrap it around a newspaper-covered cylinder, join the seam, add a base. Ten mugs in an afternoon is realistic if you have a system. Twenty is not.
The bigger difference is rhythm. Throwing rewards one long session: wedge, throw a batch, cover it, trim tomorrow. Hand-building spreads itself across days, because seams need to set and slabs need to firm up before you can handle them. If your studio time comes in two-hour scraps, hand-building often fits better. If you get one full Saturday a month, the wheel suits it.
Equipment, Space, and the Mess Nobody Mentions
A wheel needs a dedicated footprint: the wheel itself, a sturdy stool, bats, a bucket within reach, sponges, a wire, a chamois, and somewhere for reclaim. It also needs water and a floor that tolerates splashes. Most of us do not have a floor that tolerates splashes.
Hand-building needs a table, boards, a rolling pin or slab roller, thickness guides, templates, and a damp box. The damp box matters more than beginners expect — it holds work at the right moisture so you can come back to it on Thursday instead of losing it to a dry rim.
Watch the drying space, too. Thrown mugs dry on bats on a rack, stacked vertically. Hand-built mugs occupy flat shelf space, and a batch of twelve can eat an entire shelf for a week. In a genuinely small studio, that is often the deciding constraint.
Consistency: Sets, Shrinkage, and the Weight of Clay
If you sell mugs in pairs or sets of four, consistency is the whole game. Weigh your clay — a 350 to 400 gram ball is a sensible mug — and throw to a gauge, a stick with a mark at the height you want. Even with practice, six identical mugs are hard; buyers of handmade work accept small variation, but a set should look deliberate rather than accidental.
Templates give hand-builders repeatability in outline that a wheel cannot match, and thickness guides keep slab walls even. The variables move elsewhere: every joined seam behaves a little differently, and corners dry at a different rate than flat panels.
Whichever route you take, make a shrinkage test. Mark a 10 cm line on a slab of your clay, let it dry, fire it, and measure again. Keep every mug in a set to the same clay and the same forming method, and they will shrink together.
Design Freedom — and the Limits of Each Method
The wheel does round, and it does it beautifully: even walls, elegant tall cylinders, generous bellies, a rim you can thin in seconds. You can alter a thrown form afterwards — facet it with a blade, paddle it square, dart and join a spout — but oval or angular profiles fight the process the whole way.
Hand-building opens the shapes the wheel resists. Square mugs, oval mugs, slab sides with texture pressed in while the clay is still flat, organic pinched forms that sit in the hand like a stone. The trade-offs are real: walls tend to be heavier, sharp corners crack, and every join is a place where the piece can fail if you rush the compression.
Handles and Rims
Pulled handles are the nicest and belong to both methods. Pull several from one lump, let them firm to leather-hard, then attach when the mug is at a matching moisture level — that single habit prevents most of the handles that spring off in the kiln. Extruded handles are the choice if you want a set to look truly identical. Rims matter just as much: a thrown rim can be rounded and thinned on the wheel almost without thinking, while a slab rim needs bevelling, smoothing, or a coil added. The last two millimetres are what the drinker's mouth remembers.
Where Each Method Pulls Ahead
- Choose throwing if you have reliable wheel access, want thin even walls, sell matched sets, and like working in one long session.
- Choose hand-building if your studio is a table rather than a workshop, if you want square or oval profiles, if you work in short bursts, or if you would rather not spend twenty minutes cleaning a splash pan.
- Choose both if you throw the bodies and slab-build the handles, or throw cylinders and then facet them into something the wheel alone would not allow.
A Practical Way to Decide
- Count how many mugs you realistically need in a month — for sale, for gifts, for the kitchen shelf.
- Write down your actual studio hours and whether you can leave work out to dry between sessions.
- Make six mugs each way, not one. One mug tells you nothing; six reveals the rhythm of the method.
- Record the clay weight, the drying time, the total minutes to finish, and how many survived the firing.
Make a Batch, Keep Notes
The leaning handle that started this comparison was fixed by a boring change: attach handles later, at leather-hard, and prop them with a scrap of foam while they set. Small, unglamorous adjustments like that do more for a mug-making practice than any switch of method.
So pick the route that matches your week, make a batch, and write down what you did — clay weight, moisture stage, drying days, which handle stayed put and which did not. Within three batches you will know your own answer, and it will be more useful than anyone else's opinion, including mine.
Photo: persik232 / Pixabay